Networking basics in the Azure Kubernetes Service
The Azure Kubernetes Services provides two Network Plugin options. Kubenet, which was the first available option, and the Azure CNI (Advanced Networking).
The Azure CNI is the only networking option that supports provides support for capabilities like Vnet peering and network policies – basically most enterprise scenarios will require using the Azure CNI.
There’s a really comprehensive guide to the Azure CNI here : https://docs.microsoft.com/en-us/azure/aks/configure-azure-cni
This post is intended to serve as an example, and to emphasise several of the points in the official documentation.
Using an existing virtual network
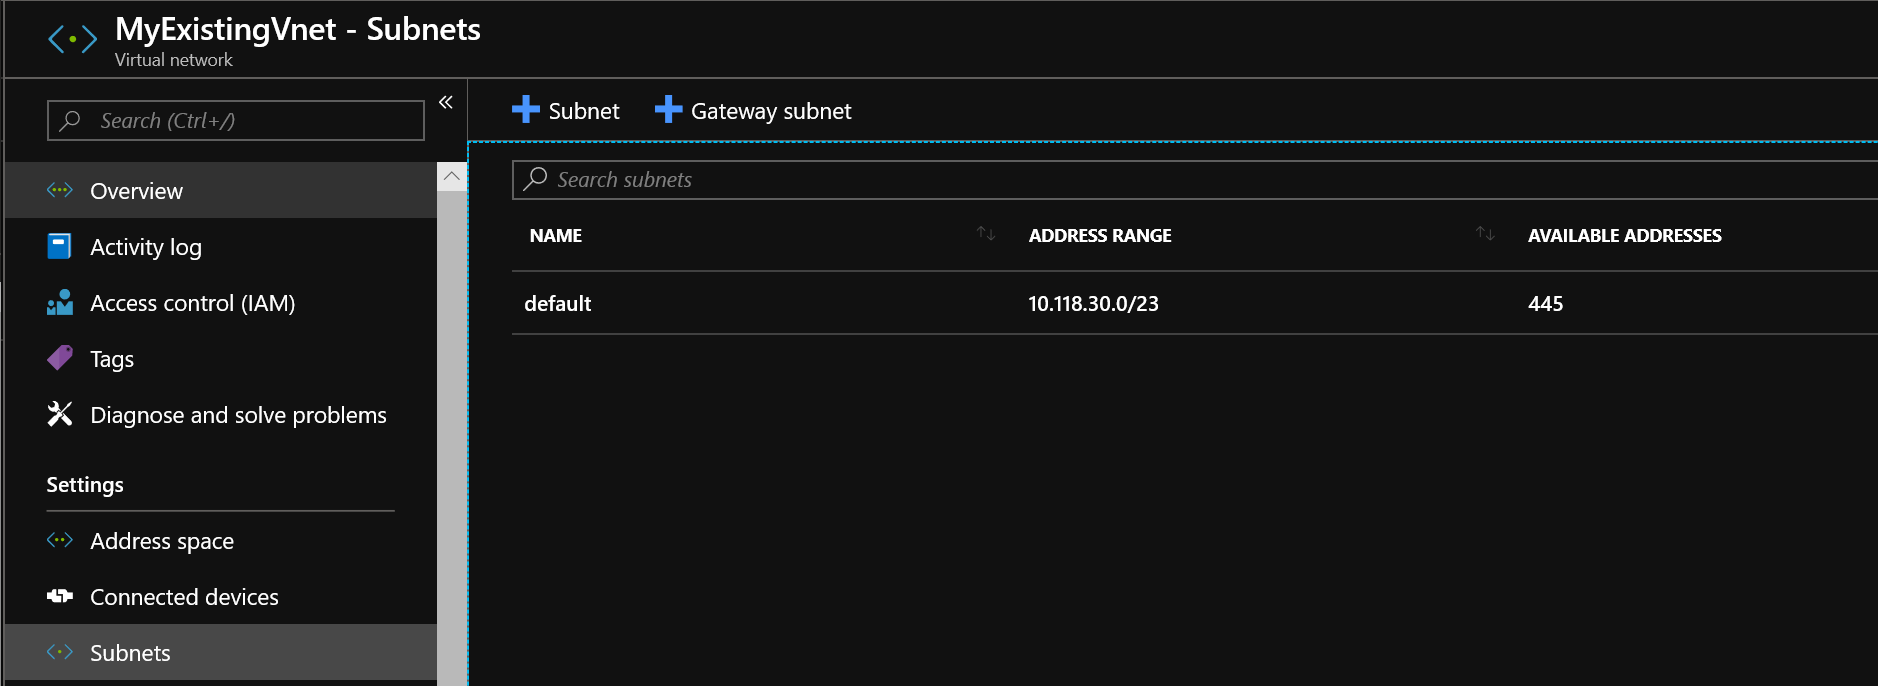
I have a /23 Vnet that offers 445 addresses. As each pod on each node will take an IP address from the virtual network, it’s pretty important to realise the limitations of using a small virtual network for your clusters. Where the virtual network is peered with other networks, including your on-prem network this can often mean you’ll end up needing a larger network address range than you first thought.
From the Azure CNI documentation, there’s a pretty handy formula you can plug into Excel to start seeing how many nodes/pods your address space will support.
=(A2+1) + ((A2+1) * B2)
| Nodes | Pods | Addresses |
| 50 | 30 | 1581 |
| 10 | 100 | 1111 |
| 6 | 62 | 441 |
So you can see that in my /23 Vnet, a suitable combination is 6 nodes with a maximum pod capacity of 62.
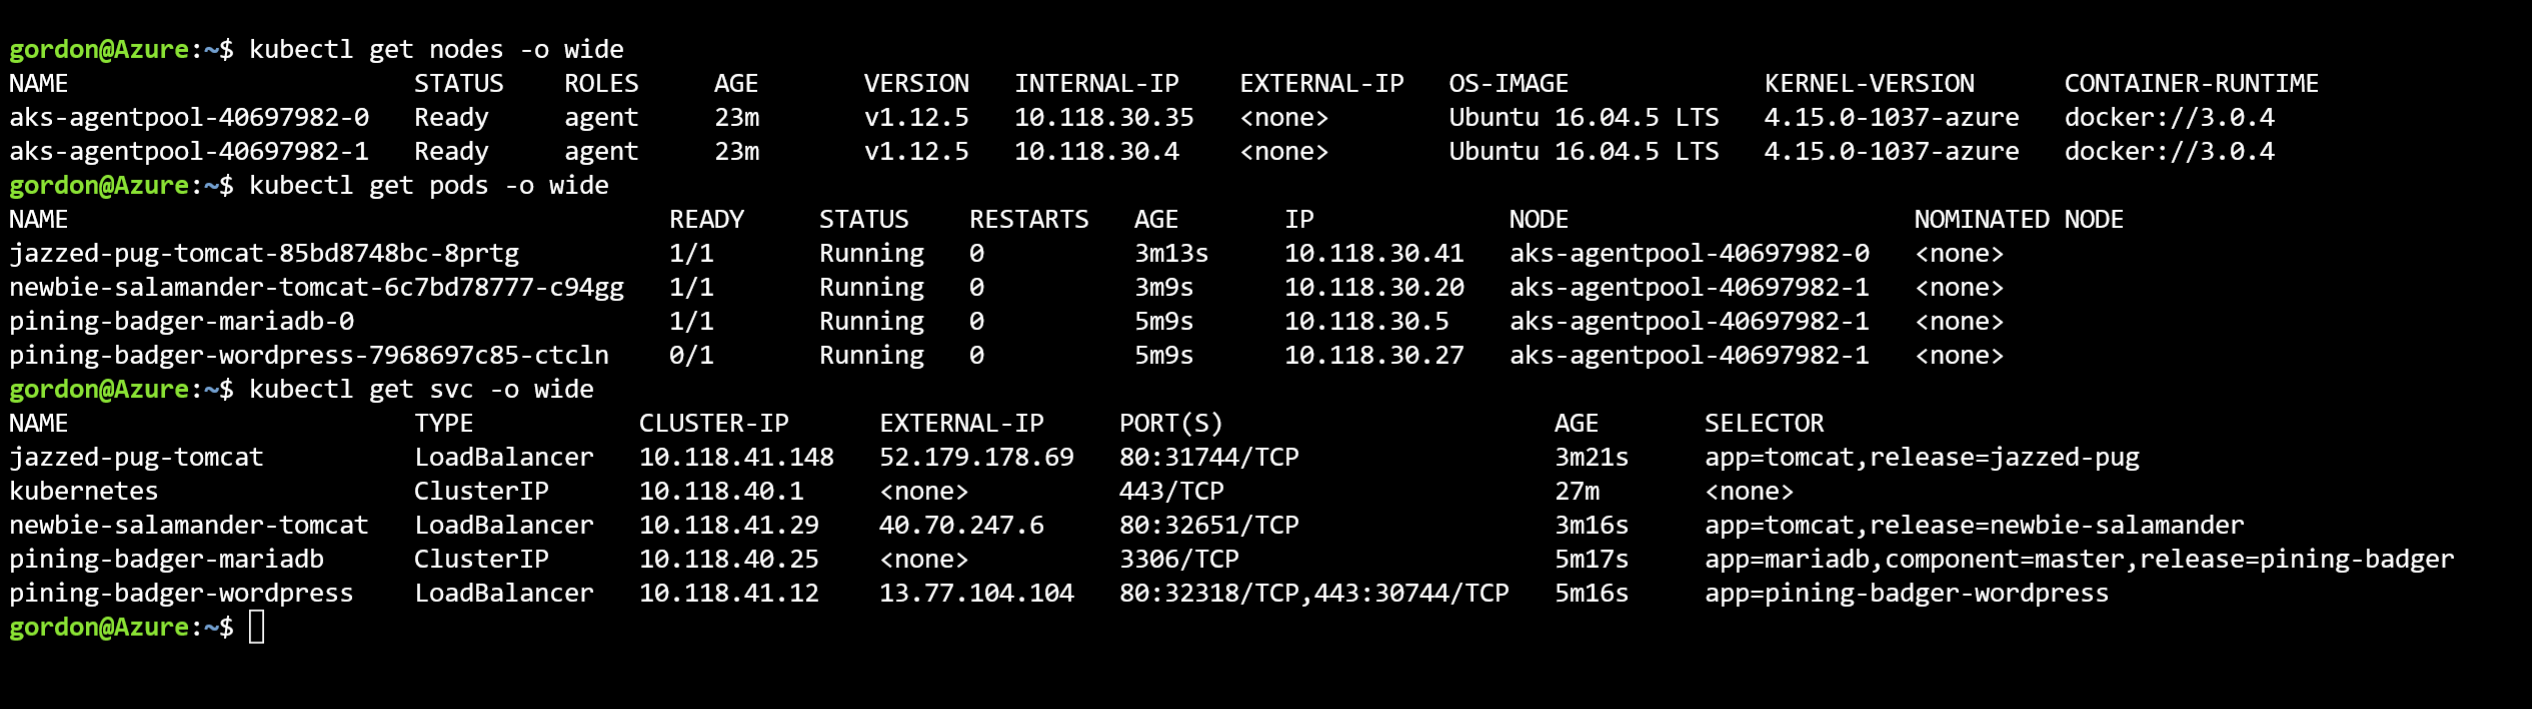
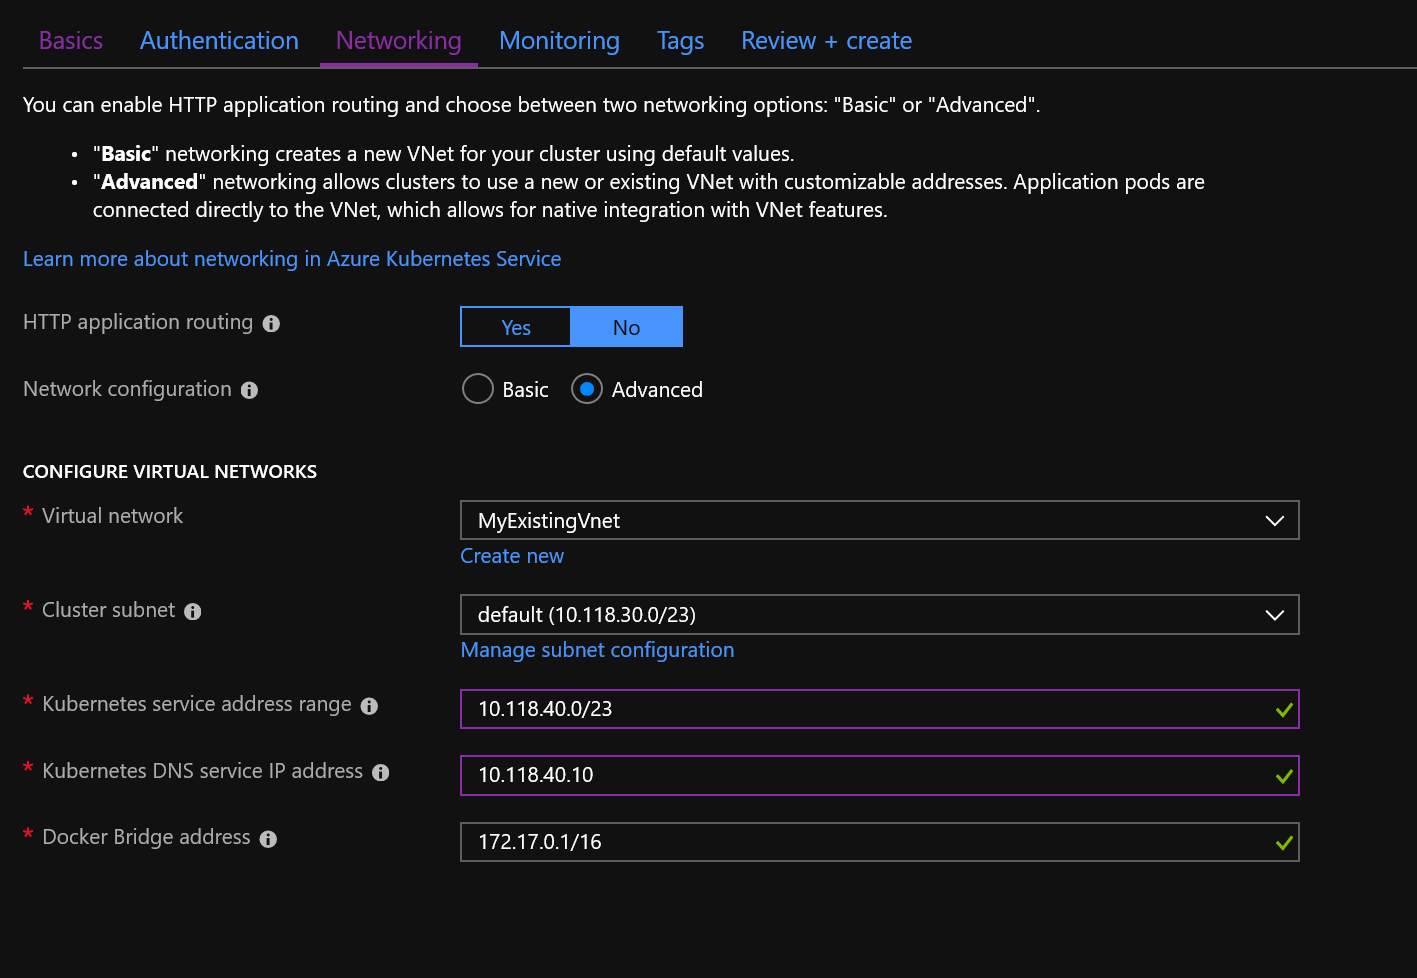
Once you’ve done this, you can create your cluster. The important piece to note at this point is;
The service address range is a set of virtual IPs (VIPs) that Kubernetes assigns to internal services in your cluster.
Therefore when you select the Service address range, you need to ensure it won’t overlap with any other IP ranges you may use… EG.
After the cluster has been created, and you’ve provisioned some pods/services you’ll see the IP addresses used as per the following;